The Gluttonous Gardener's Jewelled Christmas cake

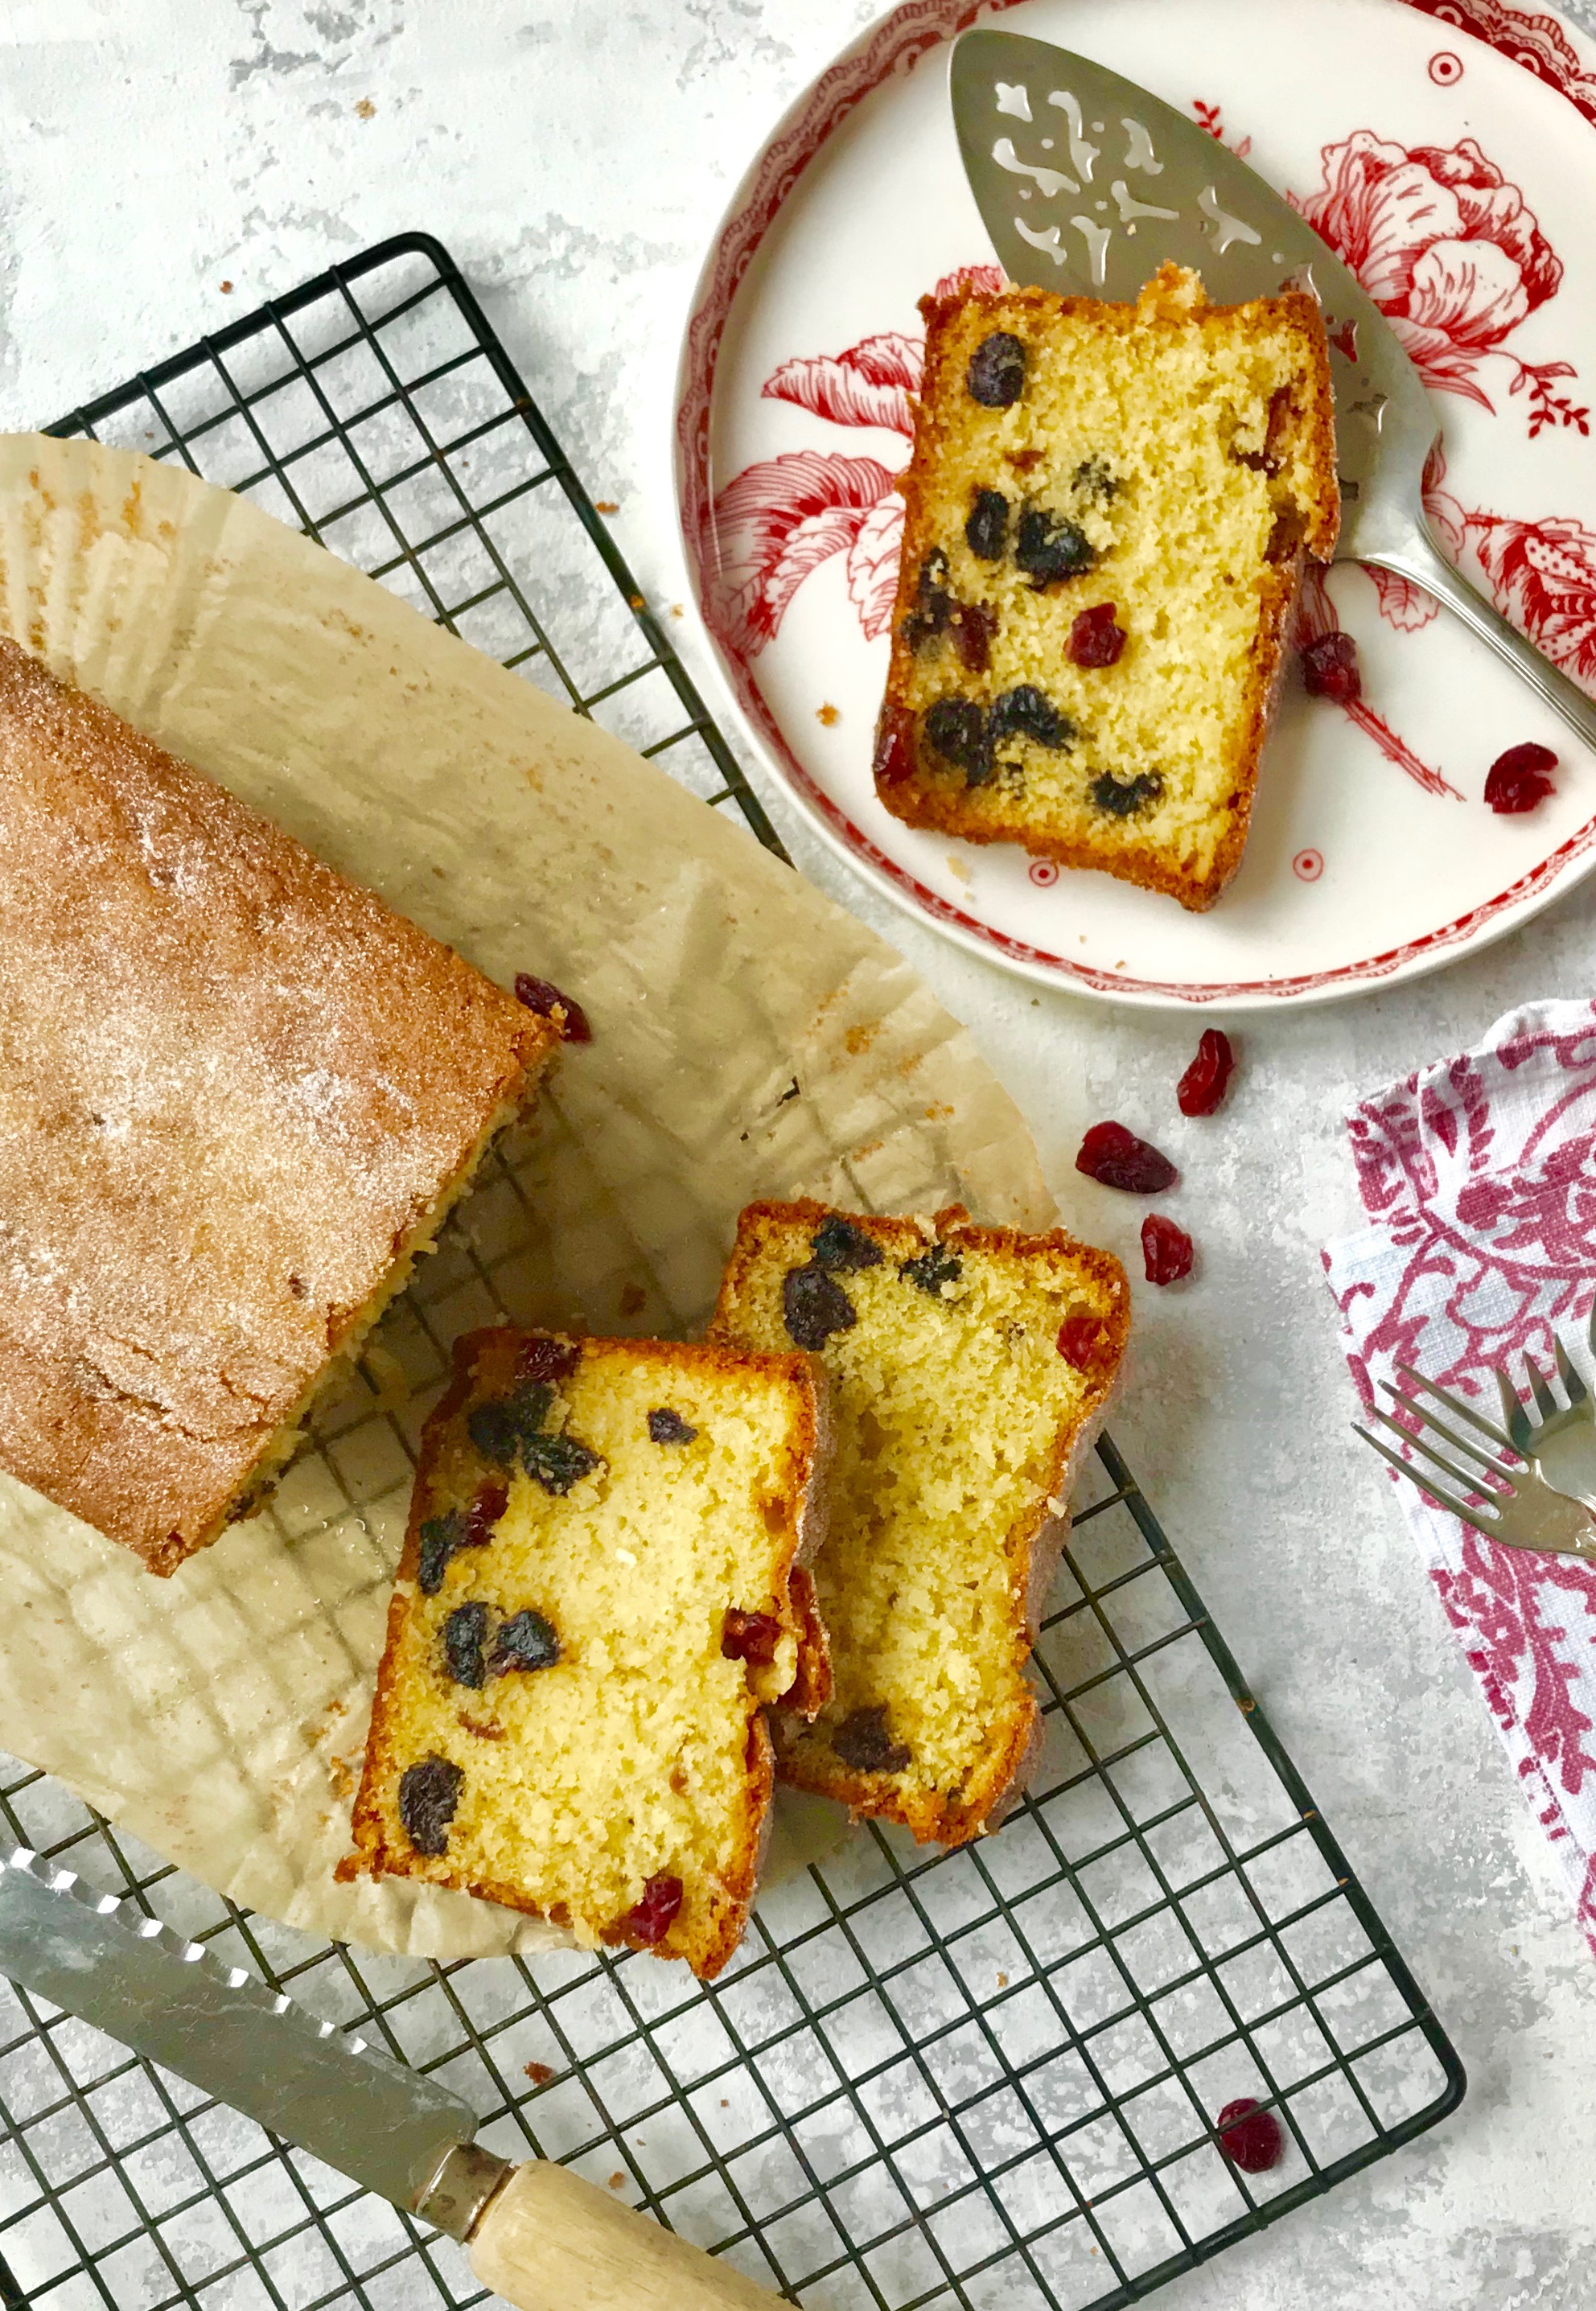
The Gluttonous Gardener traditionally create a predictably quirky alternative Christmas cake every year, and I’m really rather pleased with this one, which I created with their Head Gardener, Ned Trier. The opposite of a traditional heavy fruit cake, our delightfully festive recipe has a syrup-drenched almond and polenta base topped with jewel-like sugared calamondin oranges and lemons. It’s quick and easy to put together, and will keep for a few days in an airtight container. Serves 8.

Cake

250g soft butter

250g caster sugar

3 medium eggs

100g self-raising flour

1 tsp baking powder

20g ground almonds 

Finely grated zest and juice of one lemon

Honey drizzle

100g orange blossom or other runny honey

80g granulated sugar

Finely grated zest and juice of one lemon

Sugared peel

Granulated sugar

5-7 Calamondin oranges, halved horizontally, pips removed

4 thin lemon slices

Preheat the oven to 180/160 fan and grease and line a 25 x 25 square tin or 25cm round cake tin with baking paper or a re-usable liner.
Beat the butter and sugar together until light and fluffy. Add the eggs one at a time, beating well after each one. If it starts to curdle, add a spoonful or two of flour and continue beating.

Add the flour, baking powder, almonds, lemon zest and juice and stir just until completely combined. Do not over- mix. 

Tip the cake mixture into the lined tin and gently smooth the top. Bake for 40-45 mins until a cake tester comes out clean and the top is bouncy but firm to the touch. If the top looks as if it is starting to burn, cover the cake loosely with a sheet of foil.

While it is baking, you can make the toppings.

Mix the ingredients for the honey drizzle together in a small bowl and set aside.

To make the sugared fruits, cover the bottom of a medium saucepan with sugar 1cm deep. Add a tablespoon of water and heat gently until the sugar has dissolved. 

Lay the fruit out evenly in the bottom of the pan without overlapping. Gently poach it in the sugar mixture for 10-15 minutes until the fruit has softened and the mixture has thickened. Allow to cool completely in the pan, then return the pan to the stove and reheat gently. Continue heating until the fruit has turned translucent and the syrup is thick and shiny. 

Remove the cake from the oven, and while it is still in the tin, use a cake tester or cocktail stick to make little holes over the top. While it is still warm, pour the syrup topping evenly over the top. Spoon the sugared fruits over the top.

The Gluttonous Gardener jewelled Christmas cake

Baked cardamom chicken curry

My new book, The Batch Cook Book is out this month. It’s available on Amazon and all good bookshops, so please have a look!. 

In the meantime, here’s a sneak preview of one of my favourite recipes. It’s a big, warm-hearted, feast of a dish, which will happily feed 6 hungry people with yummy leftovers to eat the next day! Serve it with rice and the usual curry accompaniments. 

2 kg skin on, bone-in chicken thighs

2 tsp. Malvern salt

Zest and juice of 2 lemons

Black pepper

Large thumb of fresh ginger, grated (about 4-5cm)

6 cloves garlic, crushed

2 tbsp. ground coriander

4 tsp. ground cumin

1 tsp. chilli flakes

1 tsp. turmeric

10 cardamom pods, seeds crushed, husks discarded

2 cinnamon sticks

6 cloves

14 tbsp. natural yoghurt

2 tbsp. vegetable oil for roasting

2 onions, finely chopped

Four large handfuls of washed spinach 

To serve: plain rice, naan bread and chutneys

Mix the chicken, salt, lemon zest and juice and plenty of black pepper in a large ovenproof casserole dish or deep roasting tin. Cover and rest for 30 minutes. 

Mix the remaining herbs and spices with the yoghurt and add to the chicken. Stir well, then cover and refrigerate for a minimum of 30 minutes or up to 24 hours. 

Uncover the chicken and brush with the oil. Sprinkle chopped onion evenly over the top. 

Heat the oven to 180/160 fan/gas 4 and roast the chicken for 50 minutes. Baste with the juices and chopped onions, and then turn the heat up to 200/180 Fan/Gas 6. Roast for another 30-40 minutes, basting half way though until the chicken is cooked through and the skin is crispy. Move the chicken pieces around in the dish or tin if the edges are cooking faster. 

Remove from the oven and stir the spinach through until it wilts, then serve.

1. Baked cardomom chicken curry .jpeg

Warming fresh tomato soup

This is everything a winter soup should be: soothing, nourishing, gently spiced and quite simply, a hug in a bowl.


6 tbsp olive oil

12 big ripe tomatoes, halved horizontally

3 cloves garlic, crushed

5 sprigs fresh thyme, leaves removed, no stalks

Salt and freshly ground black pepper

2 medium-sized red onions

Good pinch of chilli flakes 

2 x 400 tins chopped tomatoes, plus 1 tin water

1 tbsp honey

Heat the oven to 200 °C.

Brush a little olive oil over a shallow baking tray. Lay the tomatoes on the tray, cut side down. Sprinkle the crushed garlic and thyme over the tomatoes and drizzle with 3 tablespoons of olive oil. Season generously and roast for 30 minutes.

While the tomatoes are roasting, peel and halve the onions, then slice very thinly. Place the remaining olive oil, onion and chilli flakes in a big, heavy-bottomed saucepan and fry very gently, without browning, until the onions are soft and translucent. Remove from the heat.

When the tomatoes are soft and sunken, remove and allow to cool. Gently remove the skins. Discard the skins and thyme stalks. Pour the tomatoes, juice and all, from the baking tray into the onions. Add the chopped tomatoes, water and honey, and season well. 

Slowly bring to the boil, then turn down the heat and simmer for 40–50 minutes, stirring every now and then. If it looks too thick, add a little more water. 

Take off the heat, season to taste with salt and pepper and add a little more honey if it tastes too sharp. I like my soup chunky and rustic but if you prefer it smooth, give it a whizz with a stick blender. Serve with crusty bread and a sprinkle of extra basil. 

DSC_4306.jpeg

Camembert and courgette heart tart

This is a summer showstopper that requires very little effort on your part, and it’s perfect for using up a glut of courgettes.

Serves 2-4.

1 pre-rolled puff pastry sheet 

2 tbsp olive oil, plus extra for drizzling

1 clove garlic, crushed

250g small courgettes, cut into long, thin slices 

4 big Italian plum tomatoes, sliced lengthways

Handful of small basil leaves

200g Camembert, cut into long flat slices

Salt and freshly ground black pepper

Preheat the oven to 200 degrees, flour a large baking sheet and place the puff pastry sheet on top. 

Using a floured rolling pin, roll out the pastry so it’s 4cm bigger, then gently cut out the biggest heart shape you can (within the confines of the sheet) Set aside any trimmings. Score a line lightly 3cm in from the edge of the pastry heart  

Heat the oil and garlic in a frying pan and fry for a minute. Add the courgette slices, and fry for 3-4 minutes until golden on each side. Remove and place on kitchen roll. 

Starting in the top left hand corner of the pastry heart, and inside the scored border, place overlapping rows of courgettes, camembert and tomato slices, tucking each one under the row before. Re-roll the trimmings and use to decorate the heart. Rip the basil leaves and scatter over the tart, then season with generous amounts of salt and pepper.

Drizzle a little olive oil over the tart and place in the oven for 25-30 minutes until the pastry is puffed and golden. Serve straight from the oven with a simple green salad.

fullsizeoutput_197a.jpeg

Tomato, fennel and lemon salad

This ridiculously simple salad is the perfect foil to a hearty summer BBQ. The cool tomatoes jazz things up nicely, thanks to the tangy lemon dressing and the shaved fennel brings a hint of aniseed. It only takes a couple of minutes to put together, and if you can find a big, wide platter, you’ll be able to layer the slices thinly, which will look gorgeous, especially with a scattering of feathery fennel fronds over the top.

Feeds 4

4 large beef, heirloom or plum tomatoes, sliced horizontally

2 fennel bulbs, trimmed, cored and shaved or sliced as thinly as you possibly can (save any leafy fronds for garnishing)

1/2 lemon, zested and squeezed

1 tbsp olive oil

¼ tsp dijon mustard

Salt and pepper

Layer the tomatoes onto a large flat platter or plate

Scatter the shaved fennel over the top. Sprinkle with lemon zest and fennel fronds.

Mix the lemon juice, oil and mustard together and season to taste. Drizzle over the salad and serve immediately.

Roasted carrot, wilted baby spinach and Boursin salad

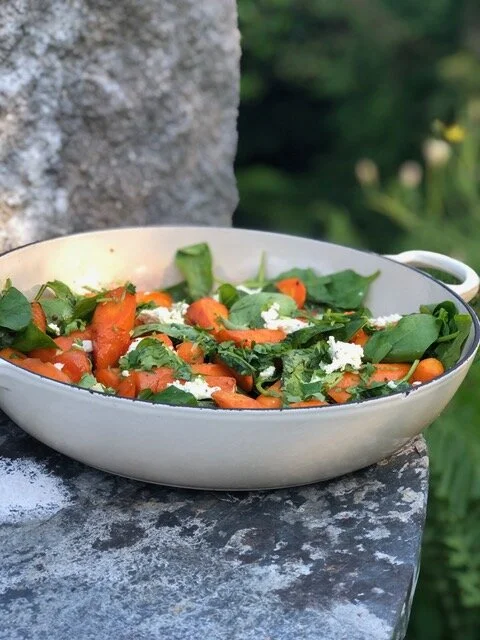
It’s definitely BBQ season, and with the forecast looking fab for the month ahead, it’s useful to have some interesting salads to serve alongside your carbonised feast. This warm salad is one of my favourites. I’ve recently re-discovered the fabulous classic 70’s cream cheese, Borsin, and it works beautifully in this salad, melting and bringing a gorgeous creamy saltiness to the party. Feeds 6 as part of a BBQ feast.

1kg carrots, peeled and cut diagonally into 3cm pieces

2 tbsp olive oil

salt and pepper

3 tbsp lemon juice

2 tbsp runny honey

2 large handfuls of washed baby spinach leaves

½ pack of garlic and herb Boursin cream cheese

1 tbsp chopped fresh chives 

Preheat the oven to 200/180 fan.

Toss the carrots chunks in the olive oil and season generously with salt and pepper.

Whisk the lemon juice and honey together

Roast for 35-40 minutes until cooked through, then remove from the oven and pour over the lemon and honey mixture. Stir well and return to roast for another 10-15 minutes.

Tip onto a shallow dish and quickly add the spinachm stirring so that it wilts in the heat from the carrots. 

Crumble the Boursin over the top, sprinkle with chopped chives and serve warm.

Roasted carrot salad 3.jpeg
Roasted carrot salad 2.jpeg

BBQ cabbage with mustard and chive dressing 

It’s going to be a hot summer it seems, and we’ve already been trying out vegetarian dishes on the BBQ.  This simple charred cabbage dish,  served up by a friend on a trip to the beach was definitely a favourite. Serves four as part of an alfresco feast. 

1 sweetheart cabbage

Olive oil

1 Tbsp White wine vinegar 

2 Tbsp Fresh chives 

1tsp Dijon mustard

Salt and pepper

Smoked paprika


Cut the cabbage into quarters lengthways (don’t remove the core as it will help to hold it together)Brush generously With olive oil and place over medium coals. Using tongs turn the cabbage frequently so that it it is charred but cooks evenly without burning. This will take about 10-15 minutes. Whisk three tablespoons of olive oil with the vinegar, mustard, chives and season liberally with salt and pepper. Remove the cabbage from the grill and Cut each quarter in half lengthways. Pour the dressing over the top While it is still hot. Sprinkle a little smoked paprika over the top. Mix gently and serve. 

image0.jpeg

Perfect pea and bacon soup 

Although it takes only a few minutes, this soup tastes as if you've been reducing and stock making for hours. Feeds 4 hungry lunchers

30g butter

1 medium white onion

500kg frozen peas

750g chicken stock

100ml single cream

4 slices of  streaky bacon 

Salt and pepper

Fry the bacon until crispy. Break into small pieces and set aside.

Gently sauté the onion in the butter until translucent. Add the peas and stock, bring to the boil and immediately turn down to a very gently simmer for about 5 minutes.

Take off the heat, and blend to as smooth a texture as your machine will give you. 

Return to the stove, and on a medium heat add the cream until warmed through but don't allow to boil. Season to taste and serve sprinkled with the crispy bacon.

DSC_6322.jpeg

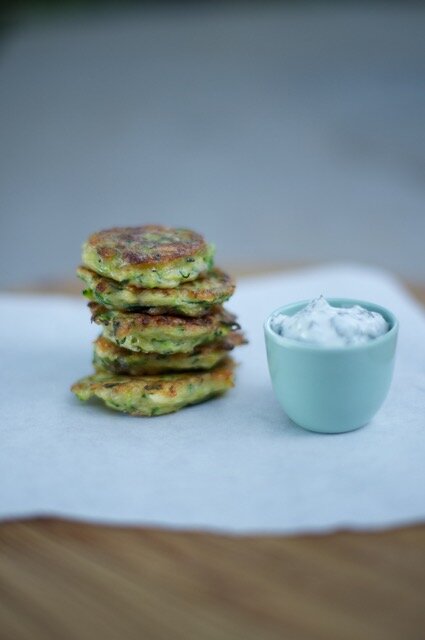
Wild garlic and courgette fritters!

You either love or hate courgette fritters. Cooked carelessly, they're like eating a bath sponge, but on form they are utterly delicious. Choose your veg wisely and stick to baby courgettes, with firm, bright green skins and barely formed seeds. Wild garlic brings a gorgeous sweet flavour and it’s only around for a short season, so make the most of it!

Feeds 4-6.


500g courgettes

1 tsp salt

200ml plain Greek yoghurt

Handful of wild garlic leaves finely chopped

salt and pepper

40g butter

60g finely chopped onions

2 cloves garlic, crushed

2 tbsp chopped fresh chopped coriander 

zest of a lemon

3 eggs, beaten

100g crumbled feta cheese

50g plain flour

salt and black pepper

Olive oil for frying


Grate the courgettes and toss with the salt, before placing in a colander to sweat out the excess liquid, turning every now and then for fifteen minutes. 

Make the sauce by mixing the yoghurt and mint, then season with salt and black pepper

Melt the butter and fry the onion and garlic until soft and set aside to cool.

Mix the coriander, lemon zest, eggs, feta and flour together, season very well, then stir in the onion and garlic.

Squeeze the courgettes to remove excess water, then add to the mixture.

Heat one tablespoon of oil in a frying pan and check it's hot by dropping a little bread in. If it sizzles, it's ready. Cook the fritters by dropping tablespoons of mixture spaced apart into the frying pan. Flatten each dollop lightly with a spoon and cook for 2-3 minutes on each side until golden brown. Drain them on kitchen roll.

Serve with the yoghurt and mint sauce and eat quickly to avoid the old sponge problem.

Sizzling Fritters!
Ready to serve!

Rhubarb and brown sugar traybake

There’s lots of forced rhubarb around at the moment, as well as plenty of spindly stalks making their way tentatively out of the soil in gardens everywhere. So when I needed a speedy cake at the weekend, and the fridge as bare,  I decided to forage in the veg patch instead.

This is remarkably easy, and makes a sweet-sharp traybake where the tart rhubarb is tamed by the dark spices and rich brown sugar. The key is to use young rhubarb and cut it into small pieces so that you end up with little bursts of flavour rather than big soggy lumps. This is at its best served slightly warm from the oven or a few seconds in the microwave. It also makes a great hot pudding with a little custard. Makes 18 slices.

180g butter or Stork

180g dark brown sugar

3 eggs

175g self raising flour

½ tsp bicarbonate of soda

¼ tsp mixed spice

1 tsp vanilla essence

160g young rhubarb chopped into 1cm pieces

1 tbsp caster sugar

Line a 22(ish)cm square baking tin with greaseproof paper and preheat the oven to 170/150 fan.

 Beat the butter and sugar together then add the eggs one at a time. Stir in the flour, bicard, mixed spice and vanilla. Gently mix in half of the rhubarb pieces, then tip into the tin. Sprinkle the remaining rhubarb evenly over the top. Bake for 50-60 minutes, checking after 50 minutes to see if a cake tester comes out clean. When it’s cooked, removes and sprinkle the caster sugar over the top. Allow to cool in the tin on a wire rack for 20 mins then remove from the tin and place (paper on) on the rack. Serve warm. 

RHUBARB AND BROWN SUGAR TRAYBAKE

White bean and onion soup with fresh thyme

This deliciously light but flavourful and filling soup is the perfect January antidote to a overindulgent December. Serves 4

 60g butter

1kg onions, sliced as thinly as you possibly can 

1/2 tbsp yellow mustard seeds

1 tbsp chopped fresh thyme leaves

3 tablespoons cider vinegar

1.5 litres chicken stock

One tin of cannellini beans, drained 

3tbsp single cream

one short baguette sliced very thinly

60g finely grated gruyere

chopped parsley to serve

salt and pepper

 Melt the butter and cook the onions very s-l-o-w-l-y. It might take up to half an hour, but be patient.

Tip in the mustard seeds, cook for a few minutes, then add the thyme and vinegar. Turn up the heat while the vinegar is absorbed. Add the stock and bring to the boil, then reduce the heat and simmer gently for 30 minutes. Pour in the beans and heat through, then mash with a potato masher in the pan, not to a pulp, just until the colour starts to lighten and you have lots of nice crunchy lumps. Keep warm. 

Lay thin slices of baguette on the grill, drizzle lightly with olive oil and slide under a hot grill until golden. Turn over and sprinkle with grated gruyere . Pop back under the grill until melted, then remove and keep warm. Take the soup off the heat and swirl through the cream. Season to taste and sail the cheese toasties on the top, scattered with parsley.

Picture by Anthea Kirkman

Picture by Anthea Kirkman

70's style baked red peppers stuffed with spicy rice

Seventies cookbooks are full of cheery gingham tablecloths and stuffed peppers posed alongside straw-clad Rioja bottles. As an avid collector of vintage cookbooks, I’m a big fan of these cheesy pictures, but in reality, stuffed peppers can be leaky, bitter towers that don’t hold their shape.

Unlikely candidates for a culinary comeback perhaps? But if you get them right, these butter-soft treasure chests are delicious, slicing open like juicy steaks to reveal a tasty, golden filling, ideal for lunch or supper. 

 To guarantee success, use the sweeter red or orange peppers and choose those with a flat base so they sit well, rather than lurching drunkenly around the plate. You also need to ensure your filling packs a taste punch so don’t be shy with spices, seasoning and sauce. This super-spicy stuffing was inspired by a trip to Istanbul, but unlike classic Turkish stuffed peppers, these are served hot. Feeds 2-4, depending on appetite, and useful if you have hungry vegans, vegetarians or gluten-free guests for supper.

160g basmati rice

100g grated courgettes 

1 tsp salt 

4 Tbsp olive oil

1 large onion, finely chopped

2 cloves garlic, finely chopped

1/2 tsp turmeric

1 tsp ground cumin

1 tsp garam masala

1 tsp ground coriander

Generous pinch of cayenne pepper

1/2 fresh red chilli, finely chopped

2 small tomatoes, finely diced

4 Tbsp chopped fresh coriander plus more for sprinkling

Freshly ground black pepper

400ml water

4 big, fat, square red peppers

Olive oil for drizzling

Heat the oven to 200/Fan 180 °C. Wash the rice well, then leave to drain. Place the grated courgettes in a colander and sprinkle over the salt. Set aside. 

Heat the olive oil in a large frying pan and sauté the onion and garlic until cooked but not brown. Add the turmeric, cumin, garam masala, ground coriander, cayenne pepper and chilli and cook for 2 minutes. Pour in the rice and cook gently, stirring all the time, for 6–8 minutes so the rice is well coated.

Add the courgettes and stir, then add the tomatoes, fresh coriander, a generous grind of pepper and the water. Simmer gently for about 12 minutes, until the rice is nearly cooked. Don’t cook any longer as you are going to be putting it into the oven. 

Slice the tops off the peppers and scoop out the seeds. Fill with the cooked rice and courgette mixture and put the lids back on the top. Place in a casserole dish small enough for the peppers to sit snugly next to each other and drizzle over a little olive oil. Bake for 1 hour, basting with the juices several times during cooking.

SEVENTIES-STYLE RED PEPPERS STUFFED WITH SPICY RICE

SEVENTIES-STYLE RED PEPPERS STUFFED WITH SPICY RICE

Can we talk about Christmas yet? Cherry and coconut Christmas loaf cake

There is something inherently festive about little red fruit. No matter what you bake, if you throw in a few cherries and cranberries it immediately feels like Christmas. The only danger is that glace fruits can make things over-sweet, so here they’re mixed with tart, dried cranberries to make sure you end up with a perfectly balanced, Christmassy cake that’s perfect with tea on a wintry afternoon. 

175g butter or stork

175g caster sugar plus extra for dusting

3 eggs

80g dessicated coconut plus extra for sprinkling

175g self raising flour

Finely zested rind of an orange

80g glace cherries, halved

80g dried cranberries

Heat oven to 180/160/gas 4 and line a large loaf tin with greaseproof paper.

Beat the butter and sugar together until creamy, then beat in the eggs one at a time, adding a third of the coconut in between each egg. Stir in the orange rind, then the flour, and three quarters of the cherries and cranberries.

Pour the mixture into the tin, then scatter over the remaining fruit, and push it just below the surface of the mixture (so it doesn’t burn)

 Bake for 40 minutes, then loosely cover with foil and bake for another 20 minutes. Check that a cake tester comes out clean, then remove from the oven and leave in the tin for 15 minutes. Remove from the tin and leave to cool on a wire rack, still in its greaseproof paper. Dust with a little extra coconut and caster sugar before serving.

IMG_2248.jpeg

Here comes the sun: sweetcorn and spring onion fritters

Sweet corn fritters are one of my simplest recipes. Even though they are packed with different flavours, they are unbelievably easy to prepare. Eat them as a snack, like hot chips, piled high and piping hot straight from the pan, or as a starter served with plain yoghurt and sweet chill sauce on the side. 

Try to make the batter a few hours in advance as it likes hanging around for a while before cooking. It’s a very forgiving dish, so you can also play around with different herbs or swop the onions for other vegetables such as leeks or spinach When you’re ready to eat, the fritters take minutes to cook but taste fabulous. Feeds 4 as a starter

1 x 440 g tin sweetcorn kernels, drained

45 ml (3 Tbsp) finely chopped spring onions

2 cloves garlic, crushed

5 ml (1 tsp) ground coriander

5 ml (1 tsp) finely chopped fresh red chilli

30 ml (2 Tbsp) chopped fresh coriander, plus extra for serving

30 ml (2 Tbsp) cake flour

5 ml (1 tsp) baking powder

2 eggs, beaten

Salt and freshly ground black pepper

Sunflower oil for frying

Place the sweetcorn into a bowl and mash it gently just so the kernels break up a little. Mix in all the other ingredients, except the sunflower oil, seasoning to taste. It won’t be very wet and you might think it doesn’t have enough liquid, but it does.

Heat 15 ml (1 Tbsp) oil in a frying pan and swirl it around. When it is hot, drop dessertspoon measures of the mixture into the pan and flatten very gently. Don’t allow the fritters to touch. Fry for 3–4 minutes until the underside is golden, then gently flip over and cook the other side.

Serve hot, scattered with more chopped fresh coriander.


sweetcorn fritters.jpeg

Smoked trout sushi balls for squeamish kids

Getting your kids to eat sushi is a double edged sword. On one hand, you can be smug that they are eating just about the healthiest food on the planet. On the other, sushi is hugely addictive and eye-wateringly expensive. Those little sushi belts that dance around in front of you carrying oh-so-tiny platelets loaded with a few tasty morsels, are too darn easy to inhale, and when kids get the taste for it, they'll demolish a whole conveyor belt in about ten minutes, leaving a huge hole in your purse. Great that they want sushi above junk, but ouch, it costs.

This is when you need to make your own. I was nervous of DIY sushi because it looked so, well, expert. It's not, although the rice takes time to prepare, so do it when you're at home pottering around. If you are lucky enough to own a rice cooker, you don't have to bother with the rice soaking stuff, you just pop it in and away you go

Using smoked trout came about when the kids were in their experimental fish stage, when they were happy to eat smoked fish but drew the line at the fresh stuff. So I made it with smoked trout, as unlike raw fish I could put it in lunchboxes with a sachet of soy sauce. Trout isn't cheap, but you only use very small amounts for sushi so a little goes a long way.

This recipe is a variation on basic nigiri, which is simply rice with fish or vegetables and the balls are easy to eat with fingers if the little darlings aren't chopstick wielding just yet.

2 cups sushi rice

85ml rice vinegar

1 tsp salt

1 tsp caster sugar

100g smoked salmon or trout, diced

10cm cucumber chopped into 1cm matchsticks,

soy sauce

Preserved ginger

Optional wasabi

Preparing sushi rice isn't difficult, but it does take time between stages. Rinse the rice  thoroughly in a sieve. Use your hands to move it around to get out the starch out. It may take several washes, but when the water runs clear,  drain and place in a saucepan with the lid on. Leave to sit for an hour.

Add two cups of tap water to the pan and bring to the boil. As soon as it starts boiling, turn the heat down to a simmer and cover tightly. Simmer for 20 minutes then don't take the lid off, just turn the heat off and let it sit for another 20 minutes. While it is standing mix the vinegar. salt and sugar together and stir to dissolve.

Transfer the rice to a big, preferably plastic mixing bowl. Pour the vinegar mixture over the rice and with a wooden spoon cool it down by making chopping movements through the rice. You want to cool it down by 'slicing' or chopping the rice, rather than turning it over as it keeps the grains intact and stops it becoming mushy.

When the rice has completely cooled, cover with a lid or place in a Tupperware. Sushi rice dries out quickly so it's good to keep it covered while you work

Now, bring in the kids and give them each a bowl of water and a plate. Using wet hands, each child needs to make a ping pong ball sized piece of rice by rolling it gently around in their palms. When it is roughly the right shape, break it open and insert a few pieces of salmon and cucumber inside

Remake the ball so that there is no filling showing. Continue until the rice is finished. Serve with bowls of soy, ginger and wasabi for the more adventurous